Getting Started
Getting Started
This guide covers getting up and running with Refinery CMS. After reading it, you should be familiar with:
- Installing and creating a new Refinery site
- Switching between the back-end Refinery site editor and the front-end of a site
- Changing the front-end design of a Refinery site
WARNING: This guide is based on Refinery CMS 4.0.0 so some of the code shown here may not work in earlier versions of Refinery.
Guide Assumptions
This guide is designed for beginners who want to get started with a Refinery CMS site from scratch. It does not assume that you have any prior experience with Refinery. However, to get the most out of it, you need to have some prerequisites installed:
- The Ruby language version 2.2.2 or higher
- A working installation of the SQLite3 Database
- A working installation of ImageMagick
TIP: If you don't already have these things, then you will need to follow the Installing Refinery Prerequisites guide.
TIP: It is recommended that developers use rbenv to manage Ruby versions and gems.
TIP: If you are not using a Ruby version manager and you have Rails 4 installed, be sure to read the Rails Application Templates section below.
Refinery is a Ruby on Rails web application. If you have no prior experience with Rails, you will find a very steep learning curve diving straight into Refinery. There are some good free resources on the Internet for learning Rails, including:
What is Refinery CMS?
Refinery CMS, often shortened to Refinery, is an open source content management system written in Ruby as a Ruby on Rails web application with jQuery used as the JavaScript library. Refinery runs on Rails 3.x, 4.2.x and 5.1+.
Refinery differs from similar projects by targeting a non-technical end user and allowing the developer to create a flexible website rapidly by staying as close as possible to the conventions of the Ruby on Rails framework.
The Refinery philosophy includes several guiding principles:
- "The Rails Way" where possible - Refinery embraces conventions used in Rails, allowing any Rails programmer to leverage existing knowledge to get up and running quickly.
- End user focused interface - Refinery's user interface is simple, bright and attractive so end users feel invited and not overwhelmed.
- Awesome developer tools - Refinery makes it easy for developers to add functionality and change the front-end look and feel.
- Encourage and Help Others - Refinery has an active community on Github, Gitter and Google Groups. If you ever have a question there is someone able and willing to assist.
Refinery's architecture
Refinery is comprised of several Rails Engines. Each engine, or "extension" acts like a mini Rails application with its own routes and views. Refinery is architected like this so that it keeps out of the way of any custom development you will do in the /app directory.
Core extensions
The extensions Refinery comes with are:
- Core - contains default layouts, views, javascripts and CSS. This extension also has an extension API for extending Refinery and everything Refinery needs to hook into Rails.
- Images - handles image upload, insertion and processing images using Dragonfly.
- Pages - allows you to manage pages including the structure of your site displayed in the front-end.
- Resources - handles file upload and storage.
- Authentication (optional) - manages users and sessions within Refinery.
Creating a new Refinery project

If you follow this guide, you'll create a Refinery site called rickrockstar that will have a custom design. Then you'll be ready to go further in the following guide and add events extension to allow Rick to tell his fans when his next gig is.
Before you can start building this site, you need to make sure that you have Refinery itself installed.
Installing Refinery
There are two popular ways to install Refinery: RubyGems and Rails Application Templates. We will discuss both and how you can get up and running with either.
RubyGems
The easiest way to install Refinery is to take advantage of RubyGems.
$ gem install refinerycms
NOTE: This step may take some time to load as it needs to download and install all the ruby gems Refinery depends on.
NOTE: If gem install refinerycms fails with an error message saying ERROR: While executing gem ... (Gem::ImpossibleDependenciesError), run gem install rails -v=5.1 then gem install refinerycms
TIP: If you're working on Windows, you should be aware that the vast majority of Refinery development is done in Unix environments. If at all possible, we suggest that you develop on a Linux based operating system.
Rails Application Templates
These application templates are another very easy way to install Refinery, and allow for a great deal of control of your installation. You can create a new Refinery application by typing:
$ rails new rickrockstar -m https://www.refinerycms.com/t/4.0.0
TIP: In order to install an old version of Refinery, you will probably have to specify the Rails version you need:
$ rails _4.2.9_ new rickrockstar -m https://www.refinerycms.com/t/3.0.0
TIP: If you want to create a rails application with an unreleased version of refinerycms, you'll have to use the edge template.
$ rails new rickrockstar -m https://www.refinerycms.com/t/edge
WARNING: If you create an application from the template, be sure to skip running refinerycms rickrockstar as listed in the next section - thee template will have completed this step.
Creating a Refinery application
The best way to use this guide is to follow each step as it happens. No code or step needed to make this example application has been left out, so you can literally follow along step-by-step.
To begin, open a terminal, navigate to a folder where you have rights to create files, and type:
$ refinerycms rickrockstar
This will create a new Rails application with Refinery built in called RickRockStar in a directory called rickrockstar. It also automatically runs bundle install which will find and install all Refinery's ruby gem dependencies. Finally, it creates your database and seeds it with some basic defaults to get you started.
NOTE: In this guide we are using an SQLite3 database for data storage, because it is a zero-configuration database that works without effort. Refinery also supports MySQL and PostgreSQL "out of the box". For important applications, you may wish to use one of these other database systems.
Refinery will create a folder in your working directory called rickrockstar. Switch to this folder:
$ cd rickrockstar
Open up that folder and explore its contents. You'll notice what you have is a very standard Rails application.
Hello, Refinery!
One of the traditional places to start with a new project is by getting some text up on screen quickly. To do this, you need to get your Refinery application server running.
Starting up the Web Server
You actually have a functional Refinery application already installed. To see it, you need to start a web server on your development machine. You can do this by running:
$ rails server
This will fire up an instance of the built-in Rails web server by default (called WEBrick). To see your application in action, open a browser window and navigate to http://localhost:3000/refinery. You should be greeted with a screen prompting you to create your first Refinery user.

TIP: To stop the web server, hit Ctrl+C in the terminal window where it's running.
WARNING: If you do not see this page, but rather see a default page for Rails, ensure you have removed public/index.html. The installer should have removed this file for you, but in certain circumstances, it may persist.
If you see this screen it means you have set up everything correctly and your Refinery CMS site is up and running.
Setting up your first user
Fill out the sign up form to create your first user. This will be the super user of Refinery, meaning this user will be able to create other users later on.
Once you've created your first user you'll see Refinery's admin.
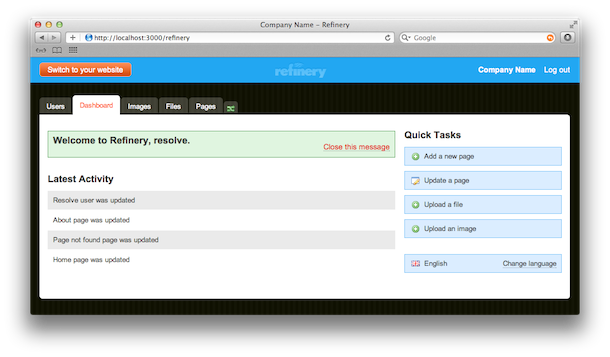
Setting Your Site Name
You'll need to set your Site Name; it's used in several spots on the CMS to give you nice branding (for instance, in the blue header at the top of the page and in the footer of your site).
To do this, you'll have to edit config/initializers/refinery/core.rb. Look for the line that begins:
config.site_name = "Company Name"
The # character prefixing the line is a comment character. The configuration options in this file (and in other Refinery initializer files) are all commented out, because these options are already set deep inside of Refinery. If you uncomment a line, Refinery will prefer the value you set inside these initializers. Go ahead and remove the # character plus the space before the word config, and then change "Company Name" to "Rick Rock Star". Make sure you save, and then restart your server (if you're using the built-in Rails server, hit Ctrl+C, and then type rails server again.
TIP: Many parts of Refinery can be customized by changing the options contained within the config/initializers/refinery/ folder. As you add extensions to Refinery, more files will be created here specific to the extensions you install.
Explore Refinery
Now you're setup, click around the various tabs in the backend and become familiar with what comes out of the box.
Switching to your front-end

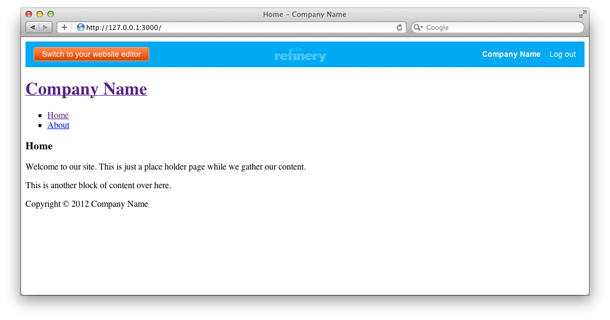
You're currently in the back-end Refinery site editor. To see the front-end site, click "Switch to your website".
As you can see, Refinery is already displaying a basic menu and layout ready for you to customise.
Customising the Design
The layout Refinery provides out of the box is very bare. We'll now guide you through customising the front-end design to give Rick the beautiful site we promised.
Overriding your first view
By default Refinery has a range of views built in to display the front-end site you currently have. But more times than often you want to customise them with your own layout and design.
TIP: Overriding Refinery views is a common pattern which is worth keeping in mind at all times. If Refinery isn't displaying something how you'd like, just override it.
If you request http://localhost:3000/about, this maps by default to Refinery's pages_controller.rb show action.
So as you would expect according to Rails convention, the view for this action is located in app/views/refinery/pages/show.html.erb. You won't be able to see this file because Refinery is providing it for you. Next, let's override that view and replace it with our own.
TIP: Overriding a file simply copies the file from Refinery's code into your app/ folder. Many people are confused as to what can be overridden initially. Any controller, model, view, javascript, or stylesheet from any installed extension can be overridden, but the most commonly overridden ones are those in the refinery folder.
Overriding your first view
Refinery comes with a rake task called refinery:override which allows you to copy files out of Refinery and into your own application to change. To see a list of possible commands simply run rake refinery:override in the console. Let's override the pages show view:
$ rake refinery:override view=refinery/pages/show
Now edit app/views/refinery/pages/show.html.erb and it will look like this:
<%= render '/refinery/content_page' %>
Refinery has a content_page partial it uses just to get you started. But we'll soon remove this and use our own ERB view instead.
Rendering content using @page
Every view in Refinery has an instance variable called @page available. The best way to explain how this works is just to show you.
Replace the contents of app/views/refinery/pages/show.html.erb with this:
<section id="body">
  <%= raw @page.content_for(:body) %>
</section>
<section id="side_body">
  <%= raw @page.content_for(:side_body) %>
</section>
As you can see we're going to render a view with some HTML5 tags and along with some content coming from the CMS (those are the lines that mention @page).
@page has what we call PageParts associated with it. To see what we mean, go to http://localhost:3000/refinery/pages and then click "Edit" on the page titled "About".
When you edit the About page you'll see something like this:
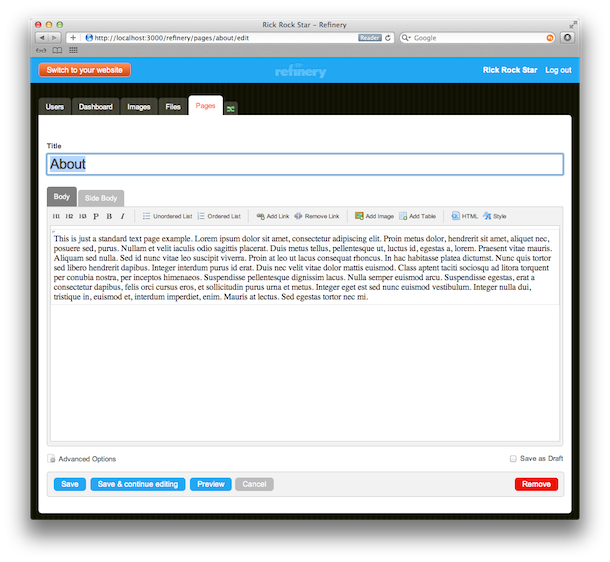
You'll notice two tabs on the page: "Body" and "Side Body". These are PageParts, or in other words, a single piece of content attached to this page that you can render in your view. There is a "Body" tab with some content on this screen. To render that same content in your view, put:
<%= raw @page.content_for(:body) %>
Styling your views
As mentioned earlier, a key principle in Refinery is to stick to "The Rails Way" where possible. This is apparent in the way you style your views too. You style your site exactly how you would style any Rails application, using app/assets/stylesheets/application.css.scss.
Open up app/assets/stylesheets/application.css.scss and add this:
body {
  background: #DDD;
  font-family: Verdana;
  font-size: 13px;
  line-height: 18px;
}

#body, #side_body {
  float: left;
  width: 45%;
  background: white;
  color: #333;
  padding: 20px;
}

#menu ul {
  list-style: none;
  padding: 0px;
  li {
    float: left;
    margin-right: 10px;
    a {
      display: block;
      padding: 5px 10px;
      text-decoration: none;
    }
    &.selected a, a:hover {
      background: #CCC;
    }
  }
}
TIP: You can add CSS for specific pages by using their slug with -page. The default for the home page is home-page.
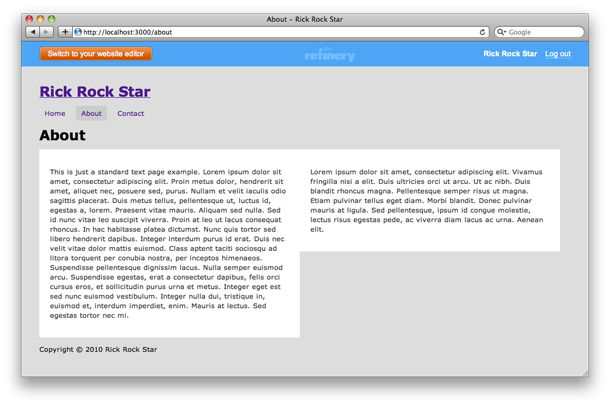
Now when you view your front-end at http://localhost:3000/about you'll notice your site has a grey background, with a horizontal menu and two white content areas.
What we just did
We just overwrote the pages/show view and replaced it with our own version. We learned how to use @page to display content entered in the backend.
Finally we added a (super) simple style that changes the colour of the background and uses our pages/show view to split into two even columns.
What Next?
You have Refinery up and running and know how to display content, change the design, and work with the administrative backend. Now you're ready to see how to use RefineryCMS with your own models, views, and controllers (MVCs). You do this by generating and customizing a Refinery extension, which is covered in the Generate an Extension to Use Your Own MVCs guide.